Category Archives: Raspberry Pi
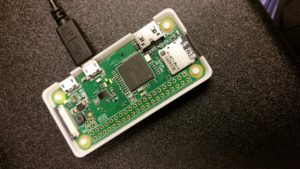
It’s not really a secret that I love messing with Raspberry Pis – I have one (a first generation Raspberry PI) that acts as a VPN server and a temperature controller for my homebrew beer keezer, I have one (a third generation Raspberry Pi) that acts as a streaming media server, I’m preparing one (a 0W) for a homebrew beer fermentation chamber, and I have a few more 0s and 0Ws for different uses. That being said, I’ve started to customize my own prep routine for getting a new Pi Zero W (and this is adaptable) running.
Card Setup
- Image latest OS onto card: Use Etcher (from etcher.io)
- Boot once (this fixes a few things, most notably the SD card size)
- Setup as Ethernet Gadget (thanks Adafruit!)
- Card /boot/config.txt -> add
dtoverlay=dwc2 - Card /boot/cmdline.txt -> after rootwait add
modules-load=dwc2,g_ether
- Card /boot/config.txt -> add
- Enable SSH: add file ‘ssh’ (no ext) in /boot/
- Alternative: sudo raspi-config – interfacing options – SSH – Yes
- Add wifi info:
- Card /boot/wpa_supplicant.conf
- Should look like:
network={
 ssid="YOUR_SSID"
 psk="YOUR_PASSWORD"
 key_mgmt=WPA-PSK
 }
Device – after boot
- Connect with PuTTY to
raspberrypi.local - Change password:
passwd - Update host information in
/etc/hostsand/etc/hostname - Reboot to force update to AVAHI (mDNS):
sudo reboot - Update software:
sudo apt-get updatethensudo apt-get upgrade - OPTIONAL: Install python pip:
sudo apt-get install python-pip
Notes:
There’s usually some easier ways to do these things, this is my way. As per usual, there’s at least six ways to skin the cat and at least four of them are correct.
The case is from Thingiverse.
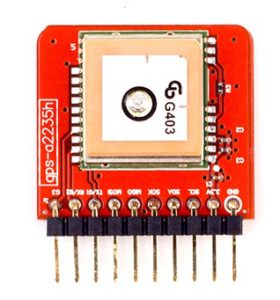
Somehow I ended up finding a Tessel GPS on Seeed Studio for $20 (it’s not $20 currently, but maybe someday soon). The Tessel GPS is really a Maestro A2235-H GPS chip on a semi-convenient breakout board.
I want to use it with a Raspberry Pi Zero-W.
The problem is that the GPS output appears to be a newer type of data called OSP. It’s not easy to read, and I didn’t find any pre-built libraries that decode it. If one slows the baud rate down, the output is in NMEA, which is standard and free libraries exist.
Raspberry Pi-0W OS Setup
I’m assuming the use of Raspbian here.
Recommended first-time setup courtesy of Adafruit.
A few things need to happen on the Pi-0W: turning off the serial console.
- $sudo raspi-config
- Option 5: Interfacing Options
- P6: Serial
- No, you don’t want the shell accessible over serial
- Yes, you want serial port hardware to be enabled
- Finish
- $sudo shutdown -h now
The last command is shutdown because at this point, I’m assuming the hardware is not plugged in.
Raspberry Pi-0W Hardware Setup
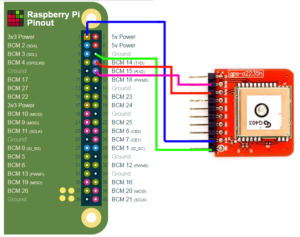
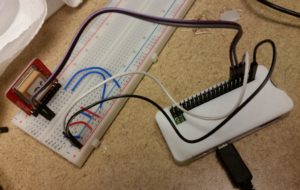
The Tessel GPS breakout has the TX and RX inverted (depending on how you look at it). Pi-0W pin 1 to the Tessel GPS 3V3 power, pin 6 to the Tessel GPS ground, pin 8 to the Tessel GPS TX, and pin 10 to the Tessel GPS RX.
Reading From The Device
When the device is first powered on, any serial connection prints gibberish because the GPS strings are in hex. To change that, one must send a string of bytes to the GPS device. I’ve prepared a quick python script to do just that:
Once this script is run, any serial connection can be made to the GPS device, such as:
$sudo minicom -b 9600 -o -D /dev/serial0
Or with python or another language.
This is a continuation of my last blog post about having my Raspberry Pi log temperatures in my basement.
In the last blog post, I noticed some problems using Node.JS due to some caching issues. Today I found the answer to my problems: Cosm.com.
After some adjustments to my code, I started seeing some pretty cool graphs on Cosm’s website.

So this seems like the right thing to use for this.
The link to all the data is here.
The modified shell script:
-73-
I am trying to have a green thumb. Right now, it is more of a pale yellow with a hint of orange. One thing I thought about doing was a temperature logger for plants that I’m starting and will be transplanted outside in mid-April, after the frost season ends in this area.
I initially thought about using an Arduino, but connecting the Arduino to my network would have required me to buy an Ethernet shield or a Wifi shield, both of which are quite expensive. I happen to have a USB wifi adapter hanging around and a Raspberry Pi that wasn’t being used. Match made in heaven!
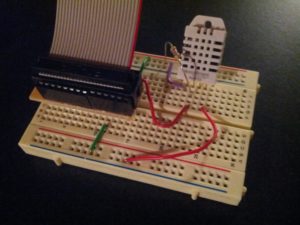
So the first thing I did was go search around on the Internet and found something from Adafruit that included source code and a hookup diagram for a DHT22 temperature and humidity sensor. Mine is an RHT03, which is similar.
I did find that my RHT03 does not run with 3.3v, so I changed the power rail to 5V, and viola!
The next thing I looked at was the source code. I made one minor change and recompiled – I edited everywhere where I saw temperature in Centigrade and changed it to Fahrenheit.
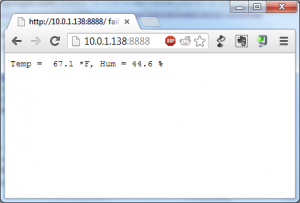
So the next step was to make it easy to get to. I don’t want to log in to my Raspberry Pi via SSH terminal just to check the temperature. So I decided that it seems Node.JS is the way to go because I can very easily write a web server for it.
Nice and simple. And of course, the code:
-73-
UPDATE: I’ve had this running a few days, and realized that it seems Node.js does not like to update as fast as I would like. In fact, it doesn’t update until I restart the server… not sure what to do about that, but it drastically limits the usefulness of that tool as a solution in this situation.

